
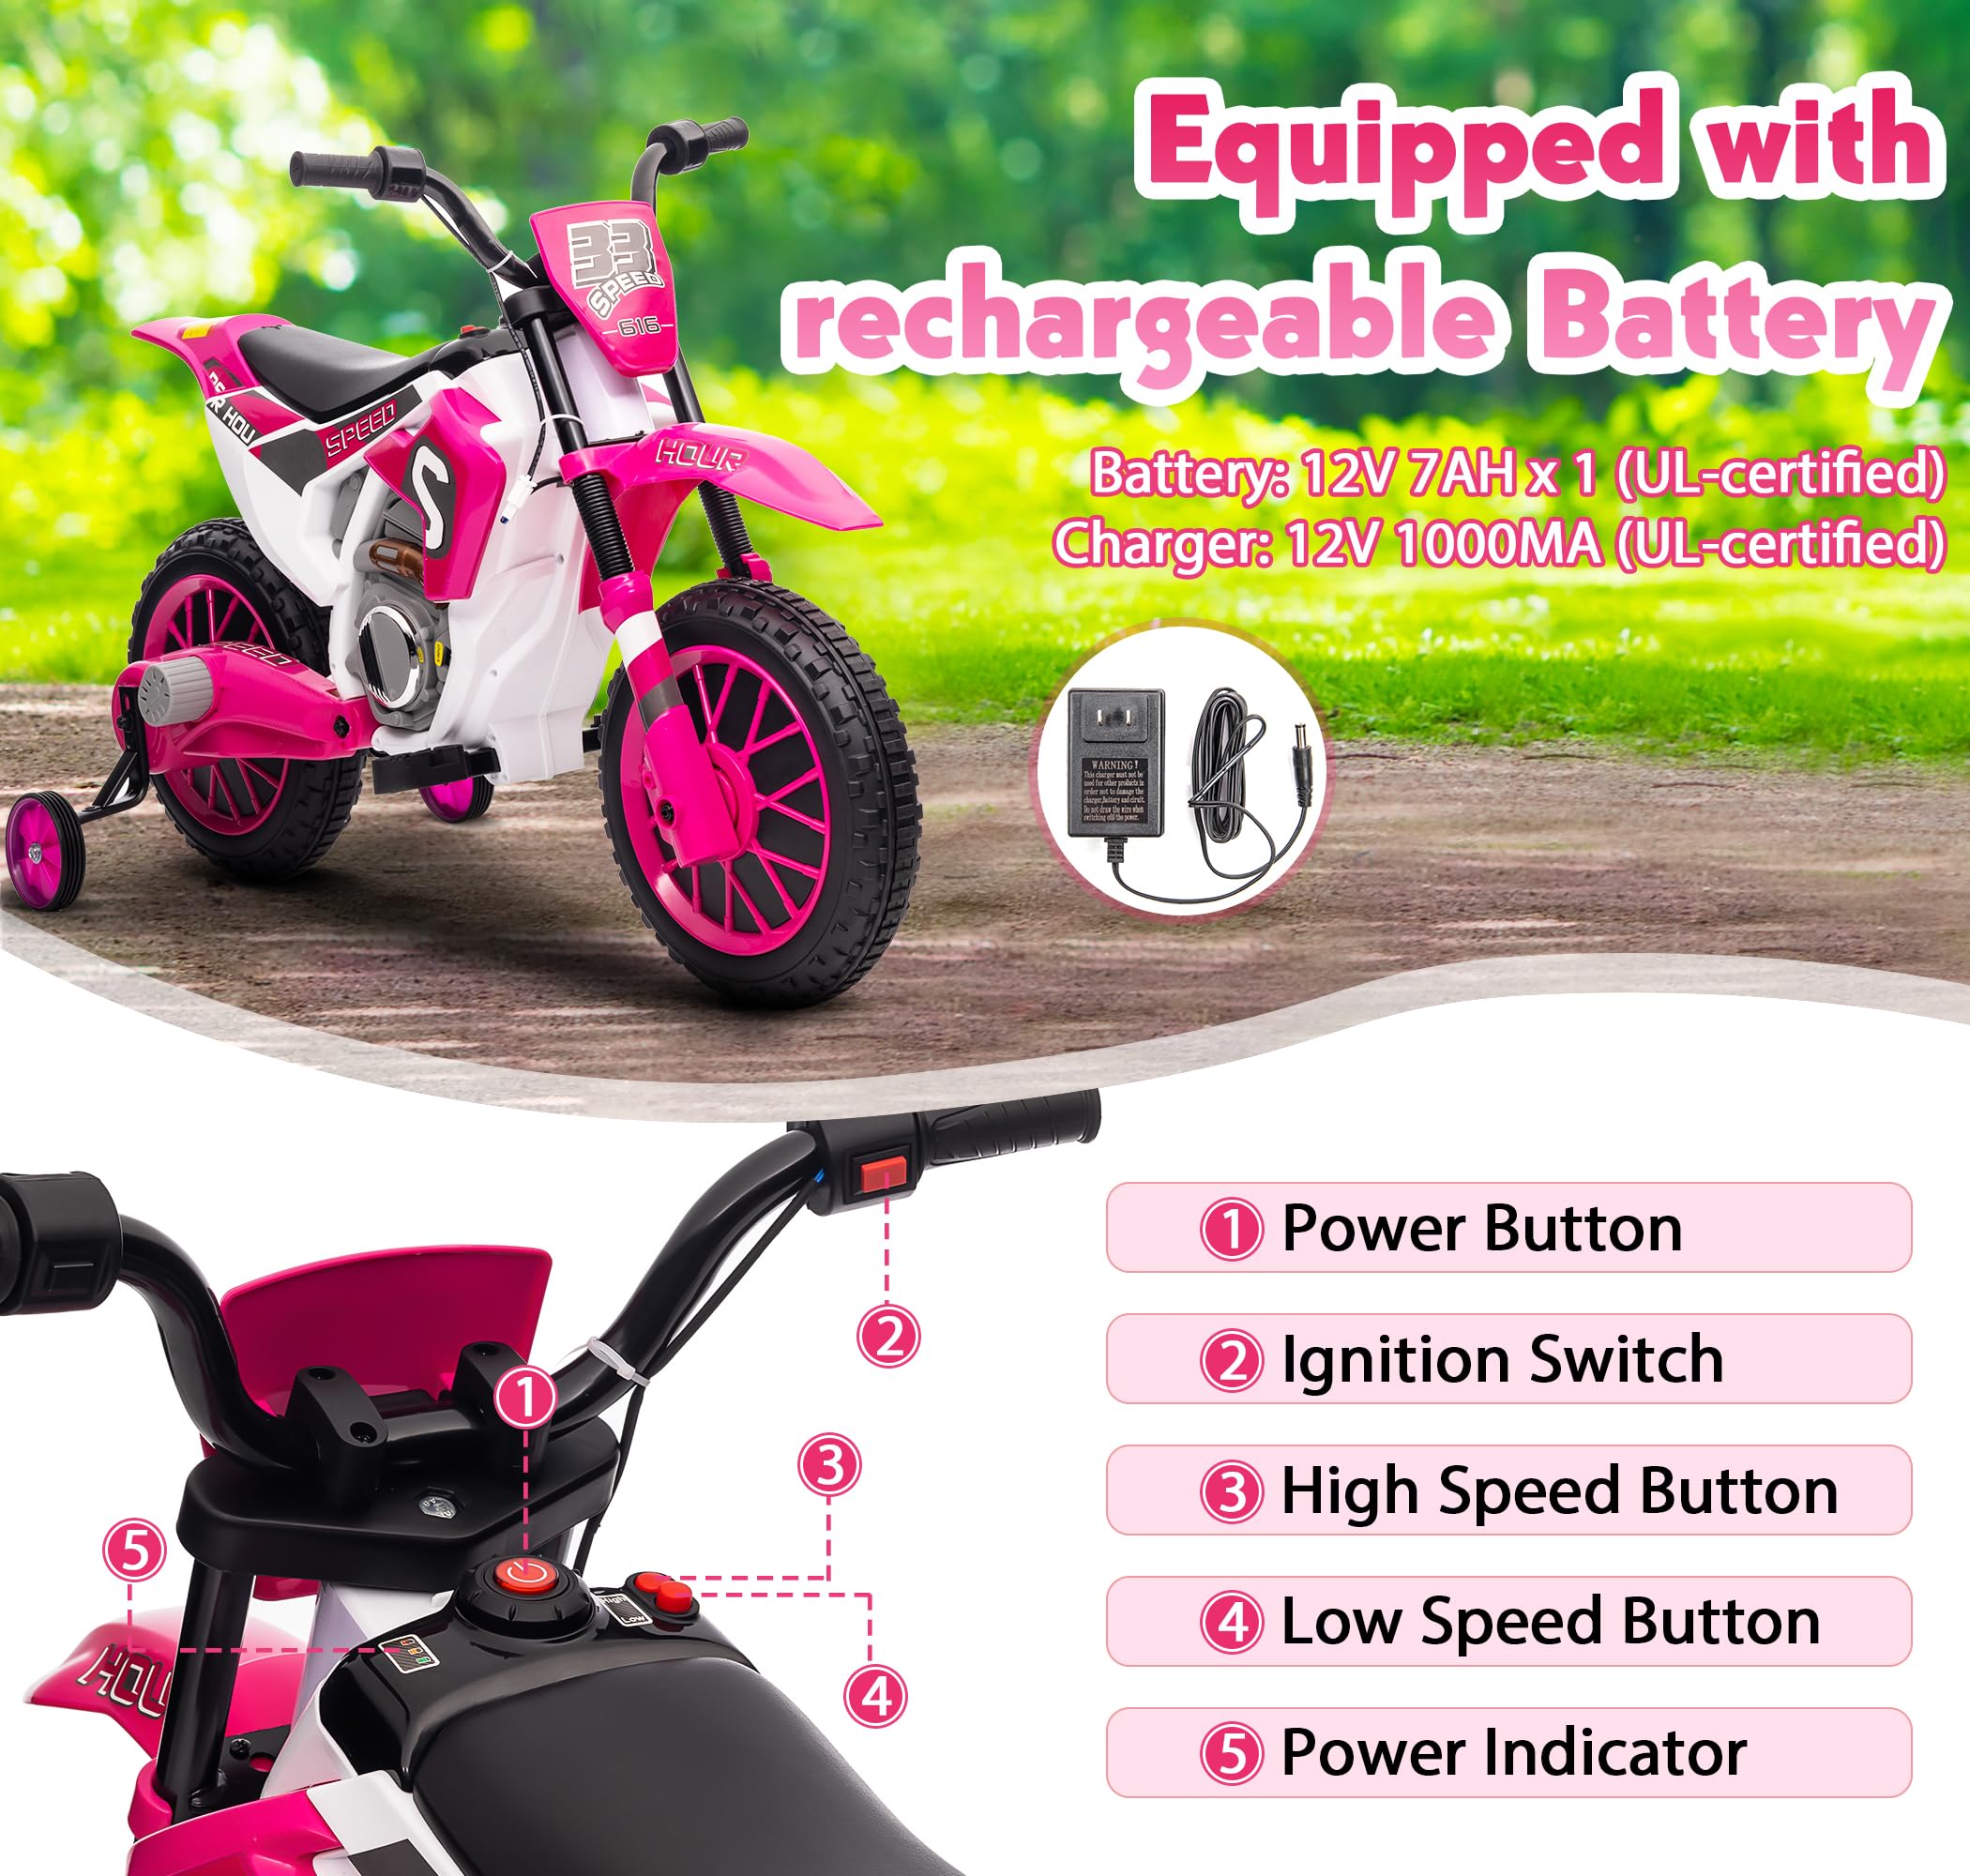
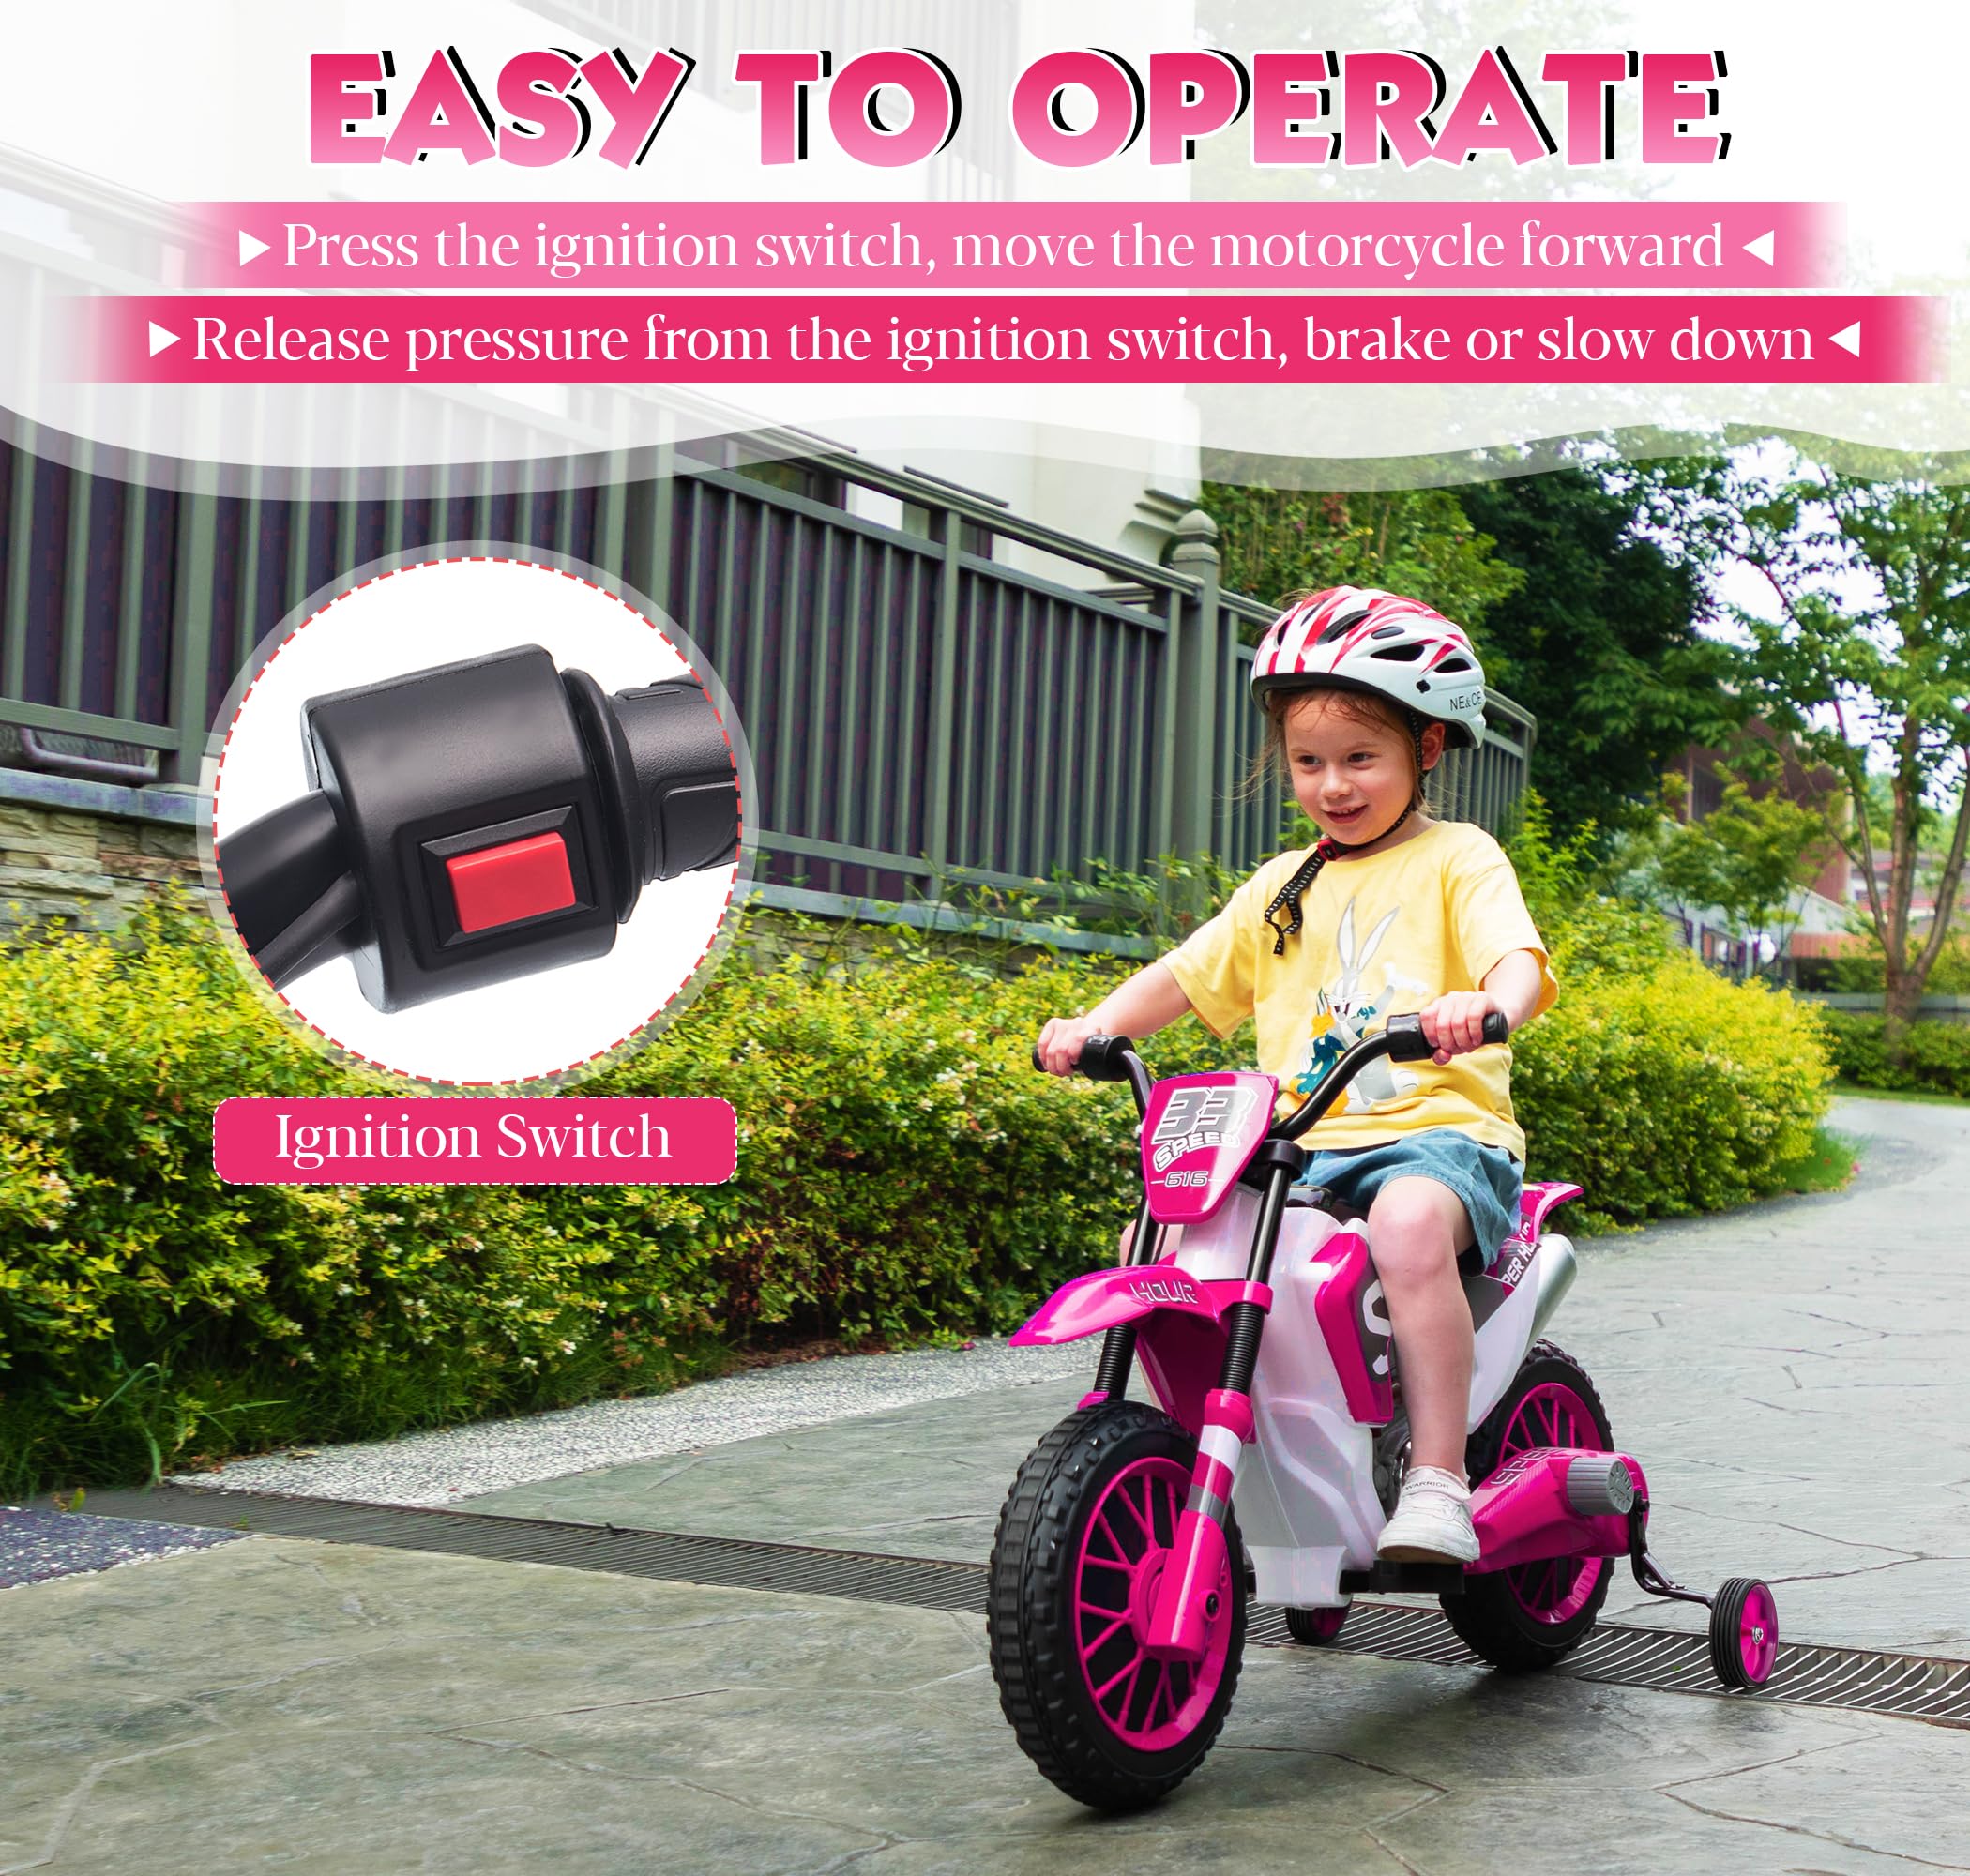
Alright, buckle up buttercups, because I’m about to spill the beans on my 12-volt ride-on motorcycle project. It was a wild ride, full of sparks, questionable decisions, and ultimately, sweet, sweet victory. Let’s dive in!
It all started when I saw this beat-up, plastic-fantastic kid’s motorcycle at a garage sale. Thing looked like it had been through a war. Missing a wheel cover, stickers peeling, the whole nine yards. But it was five bucks, and I figured, “Hey, why not?” The plan? To breathe some new life into this thing, maybe even soup it up a bit.
First things first, I ripped the whole thing apart. Took off the body panels, yanked out the old, dead battery, and generally made a mess. Gotta see what you’re working with, right? The original wiring was a joke – thin, brittle, and held together with more hope than solder. Tossed that straight into the trash.
Next up, the power plant. The original motor was probably weaker than a kitten sneezing. So, I snagged a beefier 12-volt motor online. Something with a little more oomph. While I was at it, I also grabbed a new 12-volt battery, a fuse holder, some thicker gauge wire, and a heavy-duty switch.
Now, the fun began. I started rewiring the whole darn thing. Ran the thicker gauge wire from the battery to the switch, then from the switch to the motor. And of course, popped in a fuse holder along the way for safety. Gotta protect that new motor! I also took the time to actually solder all the connections and wrap them with electrical tape. No more of that twist-and-pray garbage.
The battery mount was tricky. The new battery was bigger than the original. So, I had to get creative. Ended up using some scrap metal I had lying around to fabricate a new bracket. Bolted it directly to the frame. Not pretty, but it held like a champ.

Then came the moment of truth. I flipped the switch… and nothing. Panic set in for a second, but I quickly realized I’d forgotten to connect the ground wire. Doh! Connected that sucker, flipped the switch again, and… BAM! The motor roared to life! Glorious sound.
With the mechanical stuff sorted, I moved on to the aesthetics. The body panels were a mess. So, I sanded them down, slapped on some primer, and then hit them with a coat of bright red spray paint. Looked like a brand-new bike! I even added some new stickers for extra flair.
The final touch? A working headlight. Found a cheap LED headlight online and mounted it to the front of the bike. Wired it into the main power circuit, so it turned on with the switch. Now this thing was ready to roll, day or night.
The maiden voyage was… interesting. Let’s just say the upgraded motor had a lot more torque than the original. The little plastic wheels had a hard time keeping up. But it was fast, fun, and definitely turned some heads.
Lessons learned? Always double-check your wiring before flipping the switch. Don’t underestimate the power of a good fuse. And most importantly, don’t be afraid to get your hands dirty. This project was a blast, and I learned a ton along the way. Now, who wants to take it for a spin?
- Tools Used: Screwdrivers, pliers, wire strippers, soldering iron, multimeter, socket set, drill.
- Materials: 12-volt motor, 12-volt battery, wire, fuse holder, switch, spray paint, stickers, scrap metal.