
Why I decided to sketch a horse head
Honestly, I’ve always struggled with animal faces. Found a basic tutorial online, figured hey, why not give it a proper shot? Dug out my dusty sketchbook and a regular old pencil.
Getting started felt super rough
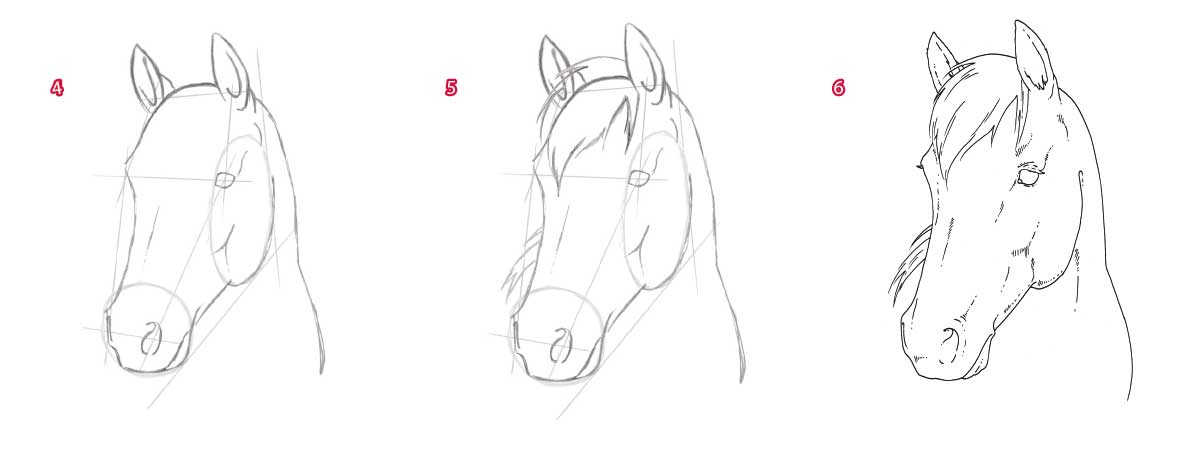
Grabbed the pencil kinda awkwardly. Blank page stared back. Started way too light, barely there lines for the basic head shape. It looked like… well, a wonky egg. Erased half of it, pressed harder this time. Still felt stiff.
Felt stuck. Rubbed my eyes, looked closer at the reference pic. Okay, it wasn’t just an egg – needed that little bump for the muzzle slanting down. Redrew, slower this time. Bit lumpy, but closer.
Fighting with the eyes and nose
Marked where the eye should be with a tiny circle. Oops, too low. Made it sit higher near the forehead curve. Then the nostril – that’s tricky! Mine kept looking like a comma. Had to redo it three times before it resembled an actual horse nostril shape. Shaded it carefully to give depth.
The ears and neck drove me nuts
Ears are deceptive. Thought they were simple triangles. Spoiler: they’re not. My first pair looked like weird antennae. Reference showed they curve slightly, thicker at the base. Smudged my lines, tried softer angles. Better. Neck connection was another headache. Lines looked too sharp. Realized horses have strong muscles curving smoothly. Smudged again, tried flowing lines down into the neck.
Adding hair details messed me up
Forelock and mane details seemed easy. Ha. Drew straight, stiff strands first. Looked fake. Remembered seeing how horse hair moves – messy, clumping. Used lighter, quick strokes with the pencil tip. Focused on groups, not individual hairs. Near the ears especially, used softer shading to show direction.
Final touches & my messy table reality
Went over the outline gently to strengthen the jawline and neck curve. Added shadow under the chin and cheekbone with the side of my pencil lead, smudging it with my finger (probably a no-no, but hey).
Stepped back. Okay, not perfect. My lines are still kinda shaky. Coffee mug ring stains the corner of my sketchbook page. Pencil shavings everywhere. But you know what?
- Started with a lumpy egg shape
- Fought for every curve, especially that dang nostril
- Probably erased half the graphite on the page
- Learned that ears are jerks
- Made a recognizable horse head!
Biggest lesson? Stop aiming for perfect on the first try. Erasers are your friend. Horses have lumpy faces, so some wonky lines just add character. Next time, maybe I’ll try holding the pencil less like a weapon.