
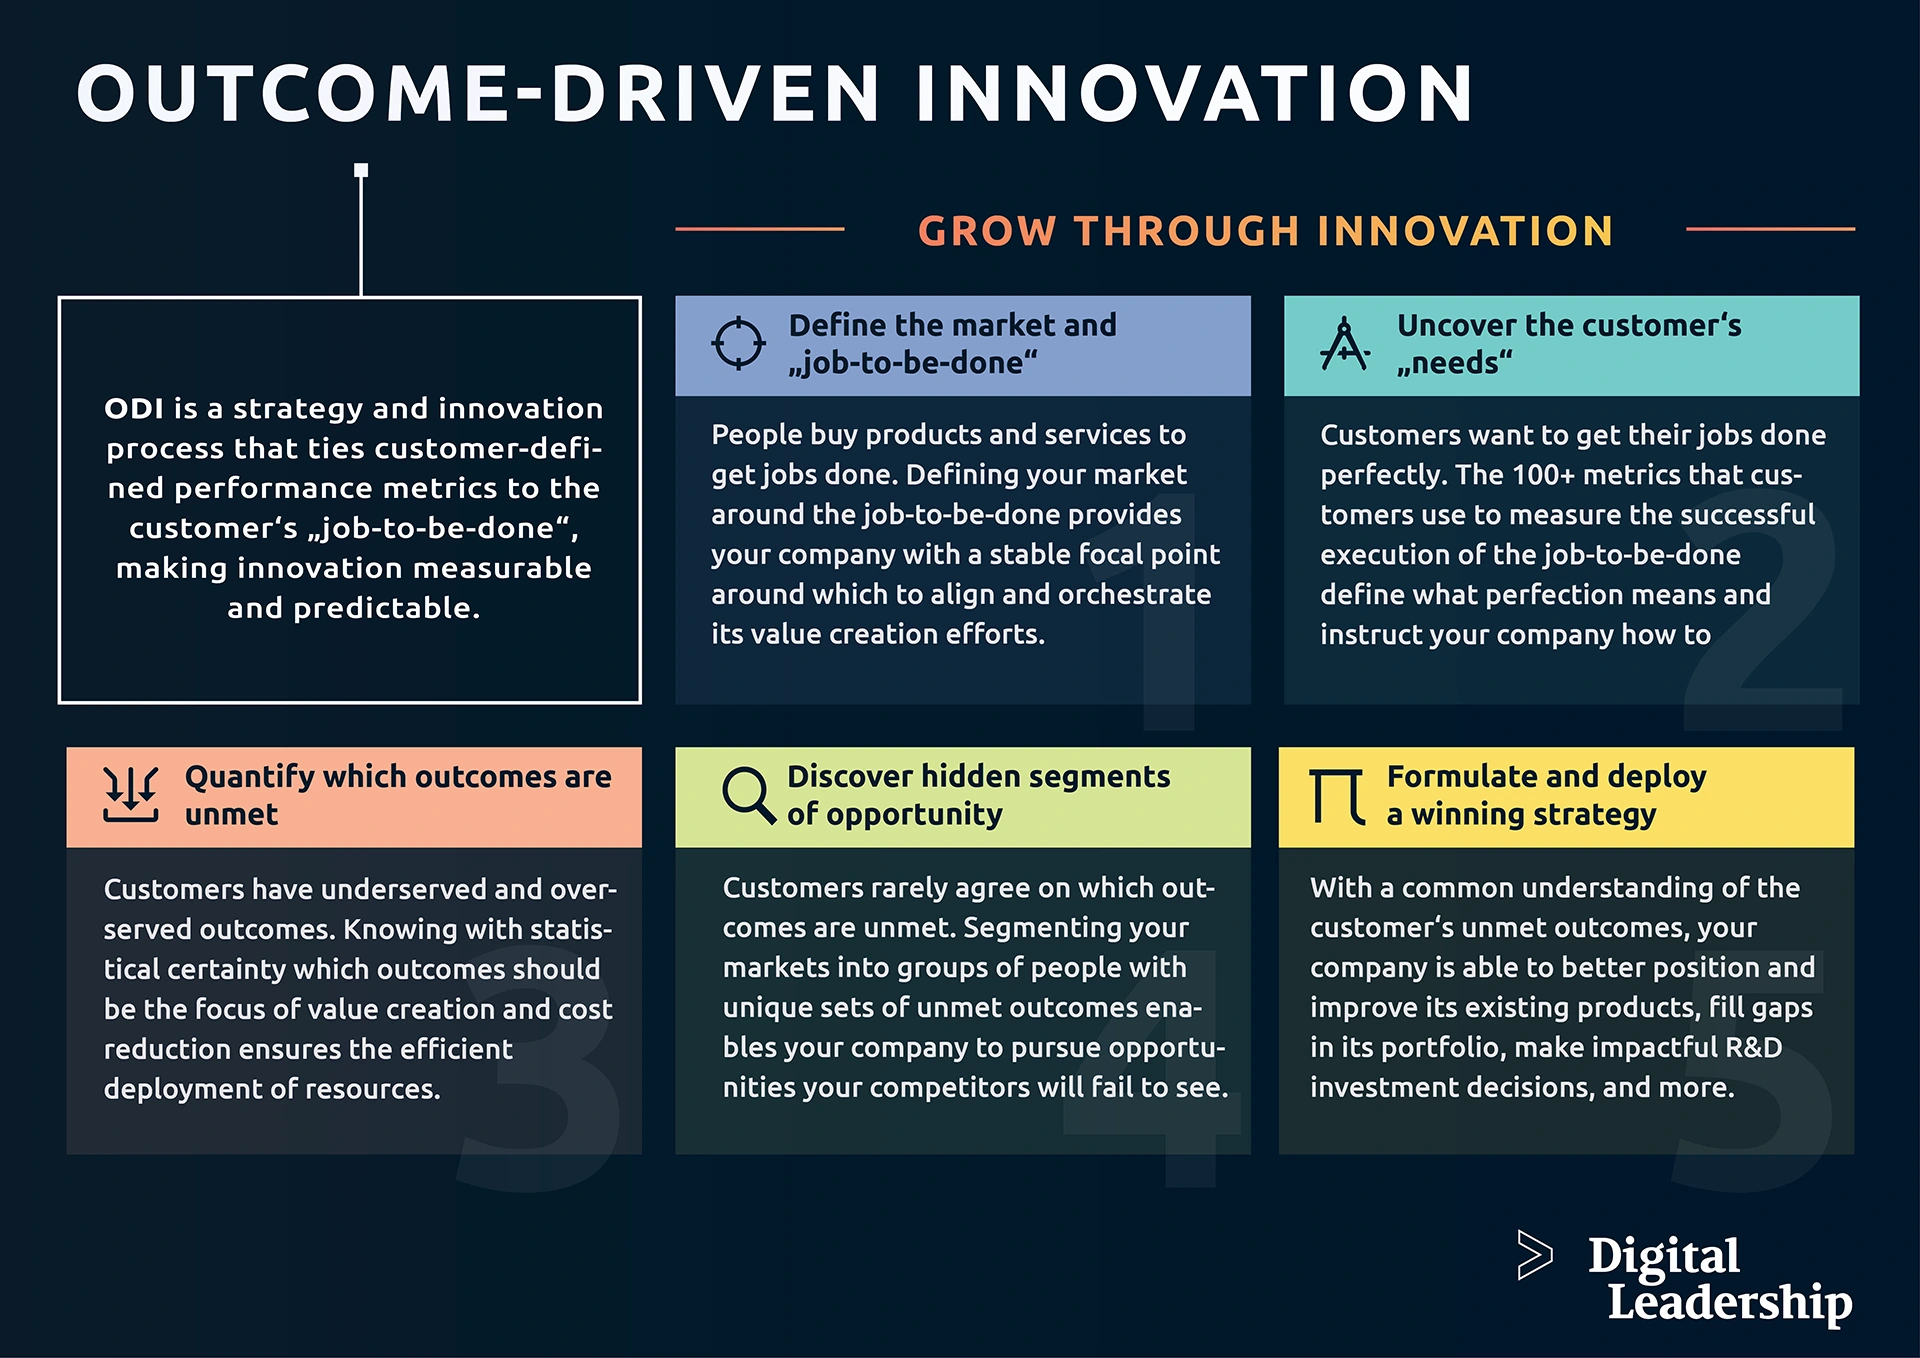
Okay, so today I’m gonna share my experience with setting up ODI charge. It was kinda a headache at first, but I finally got it working. Let’s dive in!
The Initial Setup
First things first, I downloaded the ODI (Oracle Data Integrator) software. That took a while ’cause the file was HUGE. After downloading, I started the installation. Followed the prompts, pretty standard stuff. Pointed it to my Oracle database, gave it the necessary credentials, and crossed my fingers.
The Painful Configuration
Then came the configuration part – the real fun. I had to configure the ODI Studio. This is where I started hitting roadblocks. The documentation Oracle provides is kinda vague. I spent a good chunk of time trying to figure out where to even BEGIN.
- I started by creating a new ODI repository. Selected “Master Repository” first. Gave it a name and then configured the connection details.
- Then, I had to create a Work Repository. This is where all the project-specific stuff goes. Selected “Development” as the type. Linked it to the Master Repository.
- Next, I wrestled with the Topology. I had to define the Data Servers. This basically tells ODI how to connect to my source and target databases. I defined one for my source (MySQL) and another for my target (Oracle).
- After that, I tackled the Physical and Logical Architecture. Had to map the physical servers to logical schemas. This part was confusing, but I kinda got the hang of it after a few tries.
Creating the Interface (Mapping)

Alright, with the setup finally done, I moved on to creating an interface – that’s what ODI calls a mapping between source and target. I wanted to pull data from a MySQL table and load it into an Oracle table.
- I created a new project and then a new interface.
- Dragged my source and target datastores (tables) onto the interface diagram.
- Here’s where the magic happened (or at least, that’s what I hoped). I had to map the columns from the source to the target. I just dragged and dropped the columns that matched. For some, I needed to use some built-in ODI functions to transform the data.
- Set up the loading strategy. I opted for the “Incremental Update” strategy, so it only loads the new or modified data.
Testing and Debugging (The Inevitable)
Of course, it didn’t work on the first try. I ran the interface, and BAM! Errors everywhere. Turns out, my data types weren’t compatible between MySQL and Oracle. Spent a couple of hours converting data types using ODI’s built-in functions. Also, ran into some issues with null values. Had to use the NVL function to handle those. After some trial and error, the interface finally ran successfully!
Scheduling the Load
The last step was to schedule the data load. I created a new Scenario from my interface. Then, used the ODI Agent to schedule the scenario to run every night. Set it up, tested it, and voila! ODI was now automatically loading data from MySQL to Oracle every night.
Final Thoughts
ODI is a powerful tool, but it has a steep learning curve. The documentation is not the best, and you’ll probably spend a lot of time Googling and reading forums. But once you get the hang of it, it’s pretty useful for data integration tasks. I’m still learning, but I’m getting there. Hope this helps someone else struggling with ODI!